


Crosso Bags
Pricing
Fantastic value fully waterproof pair of panniers available in an array of colours.
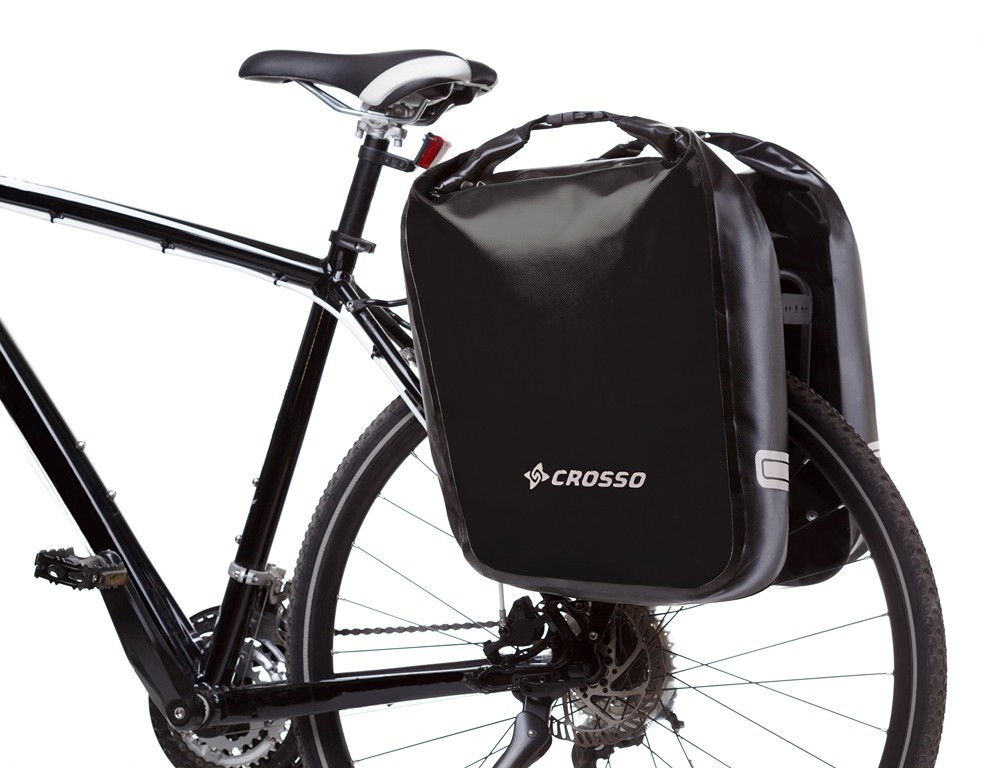
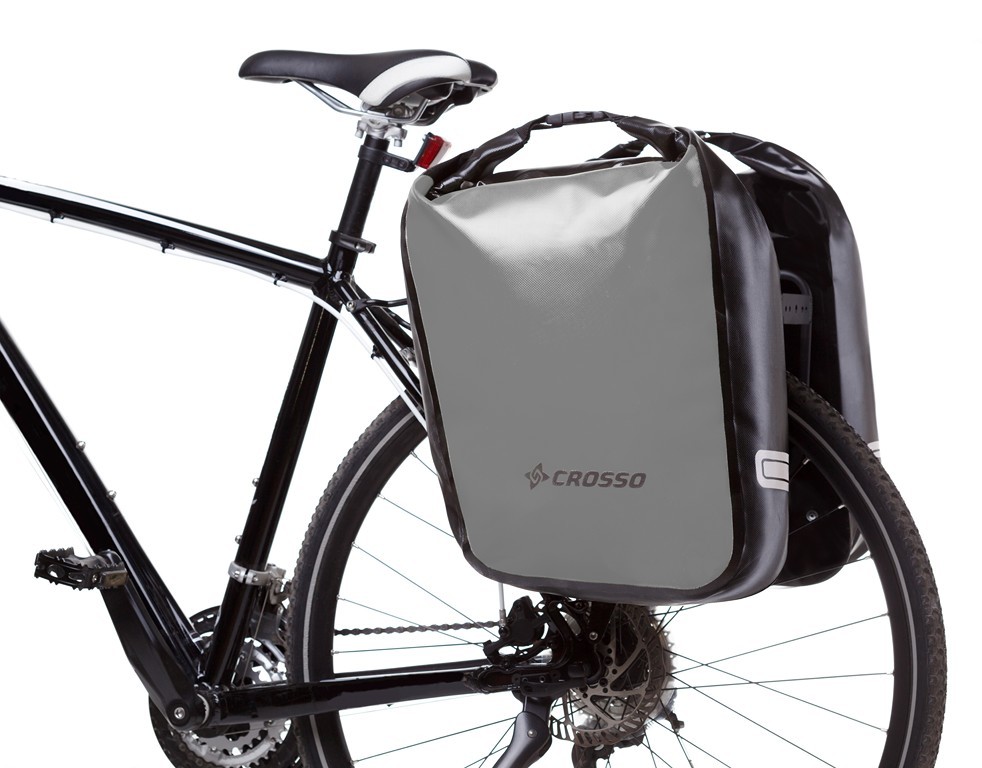
- Rear 60L Panniers (60l for the pair, 30l each bag)
- Spacious main chamber
- 3-mm stiff polypropylene plate with shape memory on the wheel side
- Welded, waterproof seams
- Reliable roll-down closure
- Nylon, unbreakable buckles
- Large reflectors visible from 600 metres
- Comfortable handle
Crosso Bags Dry 60L Pannier Bags (Pair) Rear
Crosso Dry 60 Litre Panniers
The double-sided, fully waterproof material of the Crosso Dry range stands up to mud, water and dust. Armed with welded joints, seals and rolled closure, it will fight fiercely to keep your sleeping bag and spare socks dry - even during a rainstorm or when crossing a rushing stream.Additional advantages of the Dry series are: attractive price, low weight and very large capacity. After returning home and after the trip, you will appreciate how easy it is to clean these panniers. All you need is a shower or a garden hose and it's ready.
Features
- Rear 60L Panniers (60l for the pair, 30l each bag)
- Spacious main chamber
- 3-mm stiff polypropylene plate with shape memory on the wheel side
- Welded, waterproof seams
- Reliable roll-down closure
- Nylon, unbreakable buckles
- Large reflectors visible from 600 metres
- Comfortable handle
Dimensions and Specifications
- Base width: 27 cm
- Width: 38cm
- Height after 3 rollings: 42cm
- Thickness: 16cm
- Minimum distance between upper and bottom rack mounting points - 28.5cm
- Hooks' track: 21.5cm
- Fabric: Plastel/Polymar
- Capacity: 60 litres/pair
- Weight: 1650 grams/pair
Setting up your panniers

Crosso steel hooks
The steel hook fitting system is reliable, robust and provides great value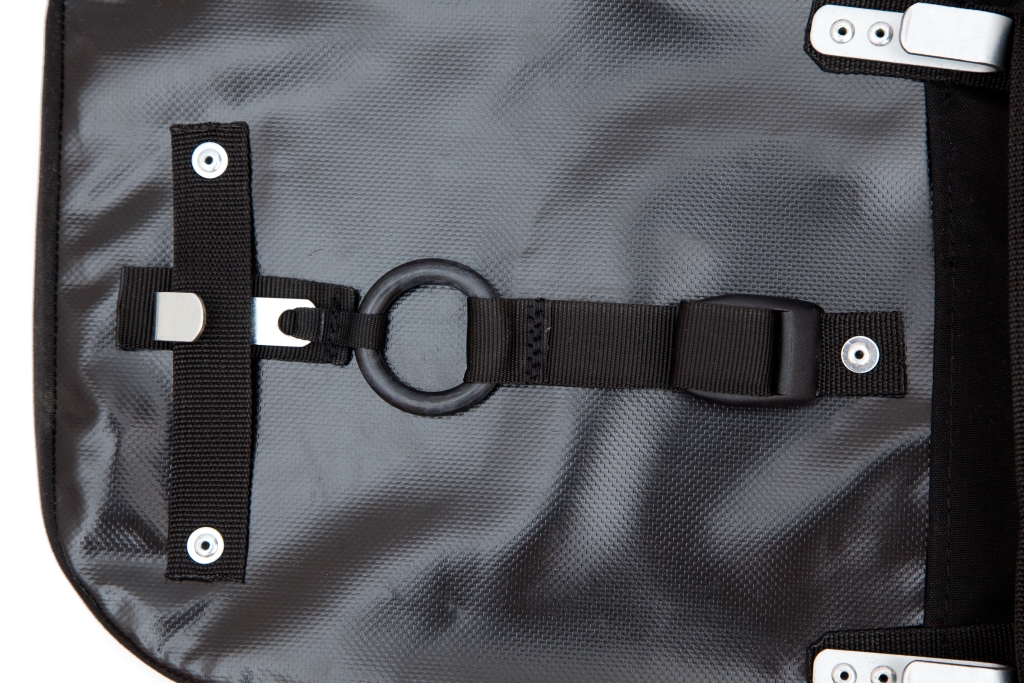
Support
The Crosso Dry panniers are fitted with an o ring to tension and keep the bags in place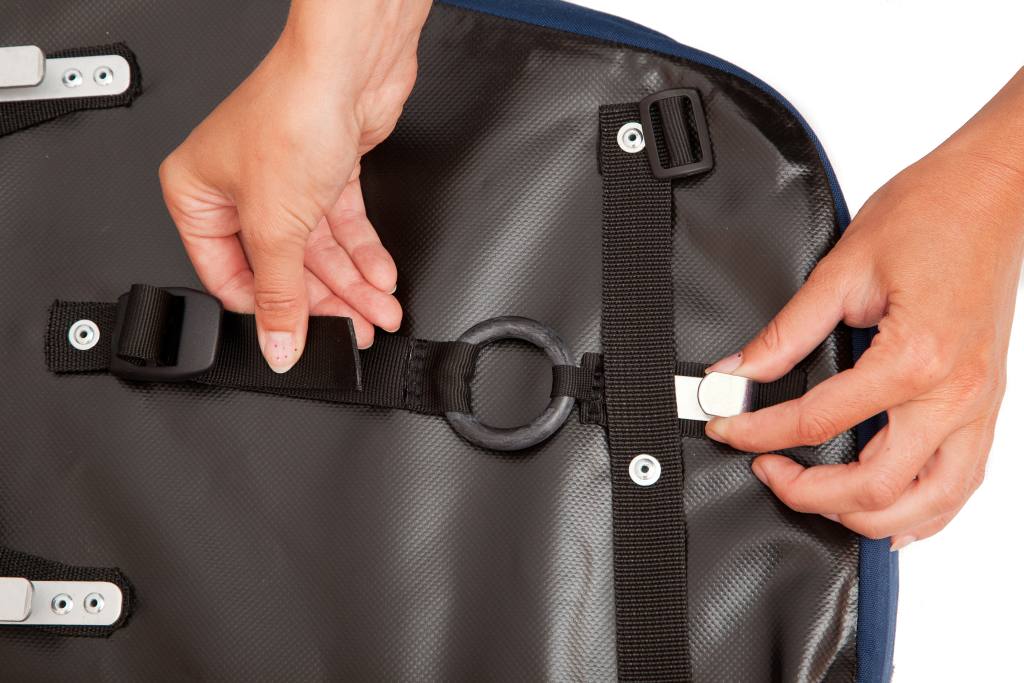
Tension adjustment
Before the first use, you need to adjust the length of the tension. When putting on the pannier, adjust so that the flexible element provides resistance, but not so much that you have to wrestle with the pannier when putting it on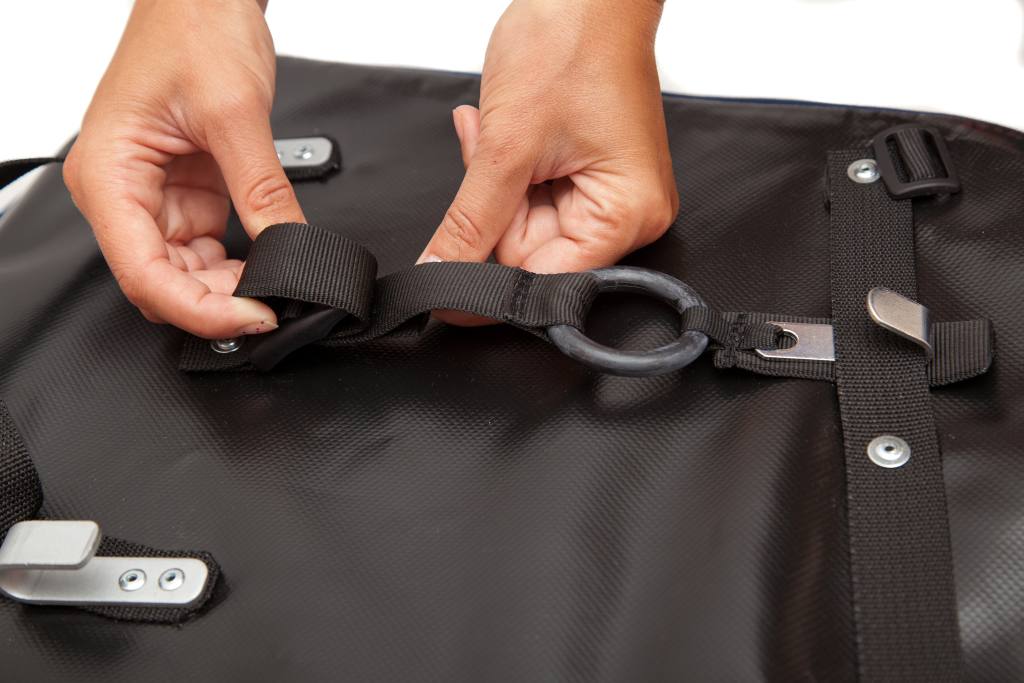
Tidy up
Pass the loose end of the strap through the buckle so that it does not hit the spokes.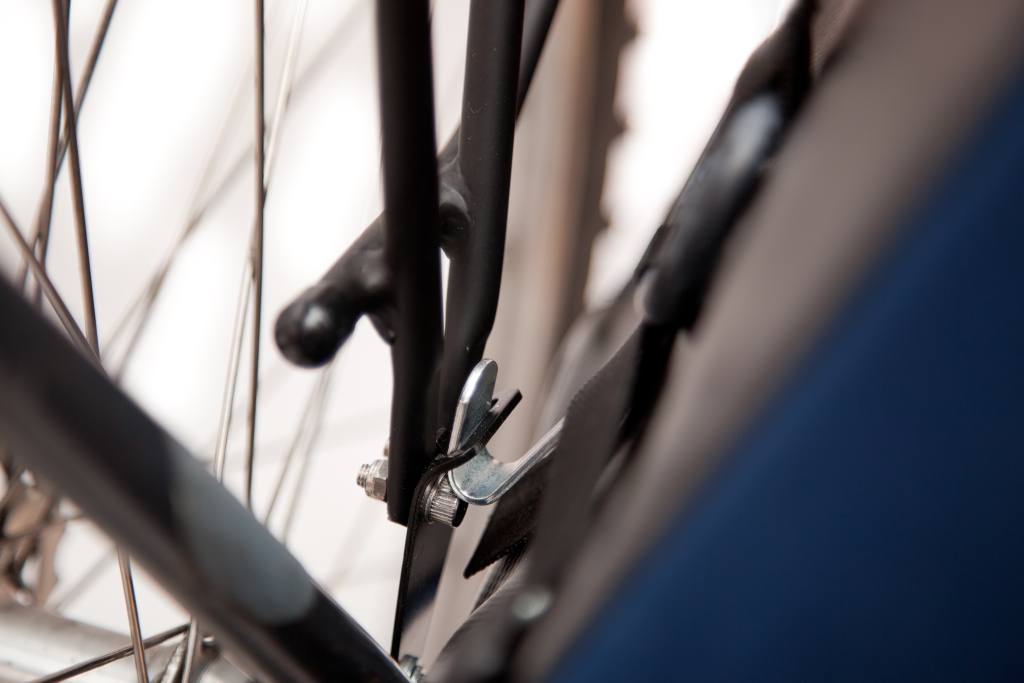
Installing the bags
Grab the pannier by the handle and place the bottom hook your rack's lower eyelet. If your rack doesn't have one: don't worry! We stock an adapter to solve the problem!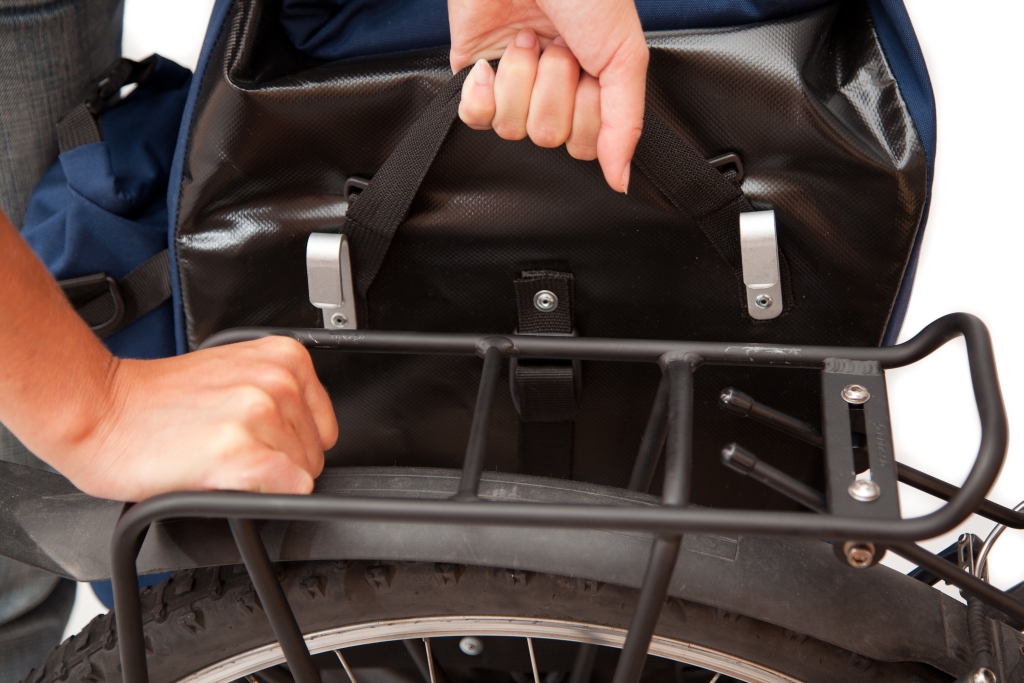
Pull!
Pull the pannier upwards so that the hooks are above the top of the rack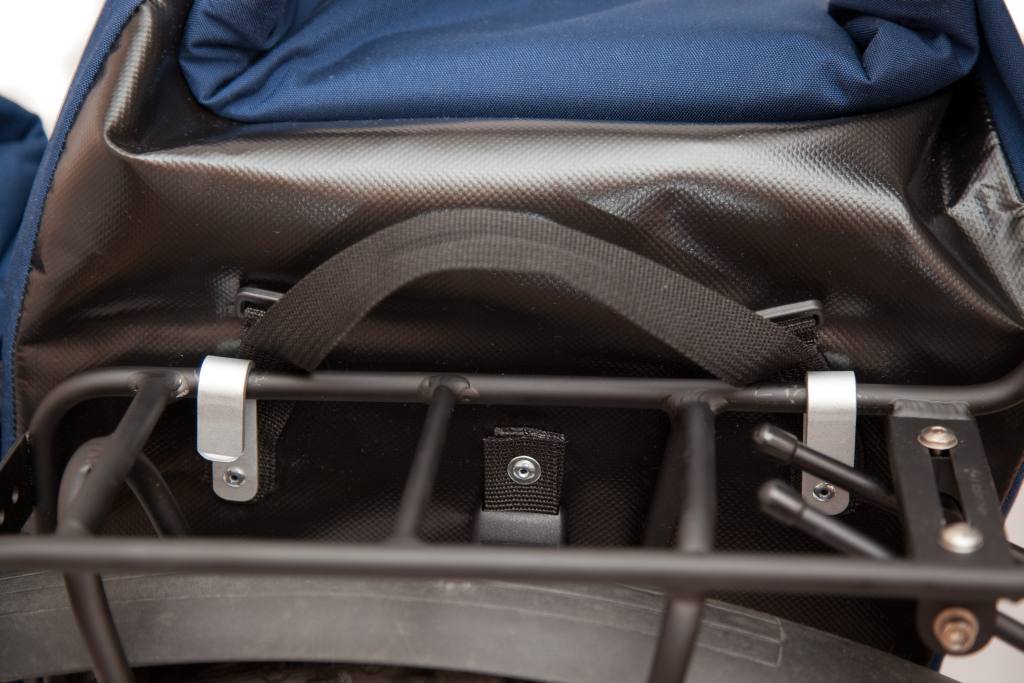
Ready to ride!
Place the hooks in the right place. To remove the pannier, follow the steps in reverse orderUK delivery
If your item is in stock and ordered before 12pm, we will do our best to despatch your order the day you place it. In busy times we tell you how long it will take us to process it.
The above does not apply to bikes, which we have to assemble and inspect before repacking for dispatch. Typically we try to have bike orders dispatched within 3-5 days, but in busier times it may take longer. In those cases we'll let you know of longer than expected delivery times.
Please bear in mind that we are closed on Wednesdays, so no items will be dispatched then.
Free postage over £40
For small items we use Royal Mail's 48 service which has a delivery time of typically 2-3 days from dispatch; though you do have the option to upgrade to 24 which is generally next-day from dispatch if you require your order sooner. Please note in some cases the item will need to be signed for, so please provide an address where someone will be in.
Orders over £40 (gbp) qualify for free standard delivery via Royal Mail 48. Please note that helmets are excluded, as they're often ordered in the wrong size/shape/fit. Some larger items aren't suitable for Royal Mail and may need to be sent by courier instead; if so, any additional delivery costs will be clearly shown at checkout.
Bike shipping
When we send out a larger parcel such as a bike or trailer we use a next-day courier - usually either DPD or Parcelforce.
For these reasons please supply us with a delivery address where there will be someone in to sign for your parcel. If there is nobody in when the couriers call, they will leave a card. You can then phone them to arrange delivery for another day or collect your goods from your local depot (a photo ID with proof of address will be required).
How will my bike be delivered?
We fully assemble, safety check and inspect every bike as though you were going to ride it away from our showroom.
However, to get it back into a box suitable for a courier to handle, we have to remove the pedals, handlebar and usually the front wheel - so some minor reassembly is required when the bike is delivered to you.
Please bear in mind that you might need a 15mm spanner for the pedals (adult's bikes generally do not come with pedals included, so you may not need to worry about this), and 4mm, 5mm and 6mm allen/hex keys for the reassembly.
Outside the UK
Since Brexit it is no longer feasible for our website to have permanent shipping prices for international delivery. Instead, if there is an item you are interested in, please Contact Us with a full delivery address and we will quote for delivery.
All the prices on our website and catalogue are in pounds sterling and are inclusive of VAT, but VAT will be removed for international orders. Please bear in mind that you will likely have to pay your country's taxes, import duties and associated courier handling fees for any items.
| Options | Black In stock now Red In stock now Grey In stock now Yellow In stock now |
|---|---|
| Type | Pannier Bags |